Add a Call to Action

Tell your readers what to do next by adding a strong call to action, an opt-in, or a content upgrade.

Want to instantly start increasing conversions on your website? Then start asking for them!

Users are much more likely to take the desired action you want them to if you simply ask them.

Any post on your website, and any content you write in general, should have a purpose. You may want to collect the user’s information (like their name, email, phone number, address, etc.), you may want to get them to contact you (by calling or filling in a form), or buy from you.

Every post on your website should ultimately lead to this goal. Let’s discuss calls to action, opt-ins, and content upgrades!

Calls to Action

A call to action (or CTA) could be a button, a link, or any other action you want your visitor to take. You might hope they take it by coincidence, but you’ll have a lot more success by putting a persuasive call to action on your post.

call to action example
Example of a call to action

Let’s say, for instance, you write about the importance of smoke detectors in your home. You could add a call to action on your page that says “Find out if your home’s smoke detectors will save your family from a fire. Call today for a free consultation”.

Persuasive copy (like keeping your family safe) coupled with an action people can take is a great incentive for them to follow through. Of course, you probably already have a contact page— but what’s the chances they will navigate there next and call if you don’t ask them to?

My rule of thumb: Every post should have a call to action.

Opt-In

Another popular goal for your blog post might be to have some sort of opt-in to your email list. Growing (and actually utilizing!) an email list is still a very powerful form of marketing. A great way to grow your list is to get people to opt-in from content they are already engaged with.

Example of an opt-in
Opt-in example

Today, most marketers use some sort of incentive (like a free gift—which we’ll discuss in a minute), but you don’t have to. You could simply have a box that says “Want more great content about X? Sign up and we’ll send them to you” followed by a form that puts the user into your email marketing system.

An opt-in is a specific form of a call to action, and one that can be highly beneficial in being able to market to your visitors long after they’ve left your website… At least you know they are already interested in your content!
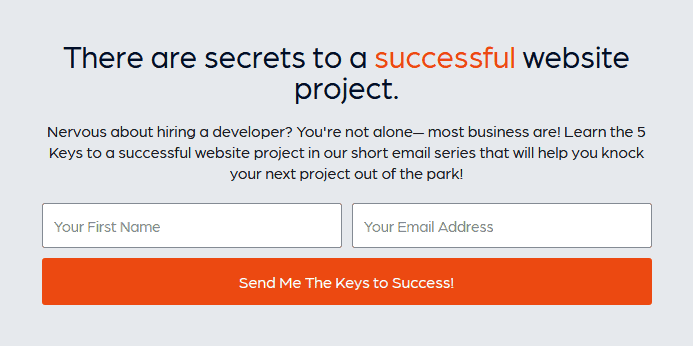
Content Upgrade

A content upgrade is a incentivized opt-in where you offer your visitor even more valuable by giving them some sort of free gift (like a PDF, a slideshow, or a series of emails) for opting in to your email marketing list.

Example of a content upgrade within a blog post

An opt-in (like we discussed previously) has lots of advantages, and a content upgrade gives your user a reason to opt-in.

Your content upgrade doesn’t have to be extravagant… It could be a cheat sheet that covers the information in your post, a case study of how to put your lessons in use, or a series of emails that cover a topic more in depth.

Anything that could add value to the content you’ve already provided is a great content upgrade!

Add Categories and or Tags

Using categories and tags can improve your website’s organization and help readers find the content they are interested in.

Do me a favor… Go see how many posts you have in the “Uncategorized” category. It’s fine. I’ll wait.

If you answer is any more than “Zero”, then you can instantly improve your website by simply categorizing your posts!

Categories (and tags for that matter) help organize the information on your website, allow you to quickly show readers relevant content, and help search engines understand the structure of your website.

How to Add Tags & Categories

Categories and tags are taxonomies that are built into WordPress core— assigning them to your posts is simple!

In the right hand side of your post editing screen you’ll see a meta box for both Categories and Tags.

Categories come in the form of a selection box, you can assign as many categories to a post as you’d like (but, really… don’t add a ton), and categories can have parent/child relationships.

Tags work by entering a tag by typing in a word. Like categories you can add as many tags as you’d like, but tags do not have any parent/child relationship capabilities like categories.

It’s likely you’ll want to use both categories and tags on your posts.

Once you have a nice collection of posts on your website, you can create category archive pages which will display all the posts within the same category. This is great for users, because they will have the ability to spend time on the content they are interested in— so long as you categorize and tag it logically.

Category & Tagging Strategy

The theory and strategy behind effective categorizing and tagging can get really deep— that’s not the purpose of this tutorial though.

Instead, I’m going to give you a basic overview of the best practices.

Use categories for broad groupings of topics

Categories are generally used for broad groups of grouping. For instance, if you had a blog about the music industry, you might use categories for the genre of music.

Fine-tune with tags

Tags typically get much more specific than categories. Using the same music industry blog example (where the category was the genre), you could use tags for a band name, a record label, or even the year music was released.

Add Post Excerpt

Hand-crafted manual excerpts help visitors skim your page as they look for relevant content.

Excerpts are hand-crafted summaries of your posts which work great in your blog feed and give the user an idea about what they can find inside your full post.

By default WordPress will use the first 55 words of your article as the default excerpt— but you can do better than that! I believe in you! The first paragraph of your post likely isn’t the best description of it you could put together.

The post excerpt might be your only shot at getting someone to read your post— so it’s worth the effort.

You’ll find the meta box for your excerpt in the Document tab of the right hand column of the post editor.

Excerpt Meta Box
Excerpt Meta Box

If you don’t see the excerpt box, you may need to change your screen options to include it.

Add Outbound Links to Your Posts

Relevant outbound links to high quality websites can improve your website’s relevance.

Some people are hesitant to link to other websites… Afraid they will send traffic away, damage their rankings, or cause confusion.

But let those fears go— because outbound links are a great thing for your website!

Let’s take a look at a few reasons why outbound links can be beneficial for your website.

Build authority and become a trusted voice for great advice

No matter how big of a website you create, you’ll never cover every topic possible— it cannot be done! However, you can provide your visitors with a wealth of information (and become an authority on the topic!) by sharing your sources and sharing other places online where people can learn more.

Think about it this way… If a friend recommends a new restaurant to, then you try it and love it— you’ll be thankful to your friend for sharing that with them. You might even call them back to tell them about your experience and thank them for the great recommendation.

Best of all, when your friend recommends something new again, you’ll trust them!

Wouldn’t it be great if your website visitors trusted you like that?

Give links to get links

Getting backlinks to your website is an important ranking factor in SEO. But where do all those links come from?

Your much more likely to get links if you are the kind of person that also gives links. Remember the golden rule? Treat people how you want to be treated…

By linking to someone’s website they just might be thankful enough to find a way to link to you too!

User research

One neat thing about creating external links is the data you can extract from it. When you link to a great resource, you can track how many people on your website click that link. A link that gets a lot of clicks might be worthy of creating similar content on your own website, since you’ve already proven your audience is interested!

This is a nice way to test the waters and see what your audience is interested in before having to invest the time to create all the content yourself.

Add Internal Links to Your Posts

Including links to other articles or pages on your website improves your authority and keeps your reader on your website longer.

Since both visitors and search engines use the links on your website to jump from page to page, a purposeful internal linking system will help make navigating your website (especially for relevant content) easier.

You probably already do a lot of internal linking (like your navigation menus, footer menus, blog archive pages, etc.), so for the purposes of this article we’re going to talk about contextual linking.

What is contextual linking?

Contextual linking is creating links within the content of your pages or posts that link to other, relevant, pages or posts on your website.

For example, the article you are reading right now is on our blog, where we write a lot of tutorial articles just like this one.

See how I linked the words ‘our blog’ to our blog page? Contextually it makes sense, and it’s right here within the body of the post— making it a perfect example of an internal, contextual link! Now visitors can click through to see what other articles we’ve written!

Why should I use contextual links?

There are a few good reasons to include internal, contextual links within your blog posts.

First, it helps point users to other articles that they may be interested in— keeping them on your page longer.

Second, it helps Google understand how different pages on your website relate to each other— and even which pages have more importance.

If your ‘Services’ page is linked to many times from lots of different pages within your website, that will tell the search engine that your ‘Services’ page must be important.

How to find contextual link opportunities

I’ve found the easiest way to add contextual links to my posts is during the editing and publishing process— not while I’m writing. Anywhere you’ve already expanded on a subject, have a service or product that you reference, or where it makes perfect sense, you can add a internal link.

Some SEO tools, like Yoast SEO, provide internal linking suggestions. It’s a handy feature, but will still require some manual work as their suggestions are not always perfect.

What you want to avoid is creating irrelevant internal links by linking to things that don’t fit in the conversation just because you want to link to it. Irrelevant links don’t help the user, and will only confuse the Google bots.

Use a Proper Headings Structure

Your heading tags should follow a hierarchical order. Refrain from skipping around randomly.

A common mistake new web designers make is using the heading tags (like H1, H2, H3) primarily for styling purposes instead of maintaining a proper structure.

Of course you do have to take both things into consideration, but it’s better to restyle a proper heading tag with CSS than to start skipping around “levels” (1, 2, 3, 4, etc.) of tags for aesthetics.

Search engines use heading tags to determine the structure and content of your website— and users rely on this too.

Each blog post should have just one H1 heading (though there are contrary theories on this), but can have as many H2, H3, H4, H5, or H6 titles as you need— so long as you keep them in order!

How to organize and structure your heading tags

Each heading tag carries weight, with H1 being the largest, and down from there. This means that H2’s are more important than H3’s, H3’s are more important than H4’s (and so on). A typical blog post will use H2 headings to separate complete ideas, with “nested” H3’s, H4’s, etc. within an H2 section.

It’s a little bit easier to visualize it…

Here’s a proper structure:

Proper headings structure
Proper Headings Structure

See how as the heading numbers get “higher” they all go in sequential order? That’s how you want to structure your blog posts!

When you finish a complete section you can jump back to an H2, even if you’re on an H4 or H5— just avoid skipping numbers as they go higher, like this:

Improper headings structure
Improper Headings Structure

You can see how messy this looks, and it’s just as confusing for search engines trying to understand your website content— it’s like you’re all over the place!

Include Semantic Keywords

Visitors might not phrase things exactly like you do. Try using semantic words related to your keyword(s) within your headings and body copy.

Semantic keywords are fancy speak for “related keywords”. For example, you might call a shape with 4 equal sides a square, others might call it a block or a cube.

When you are writing a blog post, and trying to rank for a specific topic, it’s important to take a few minutes and think about other ways your topic could be phrased. By including these terms you can paint a more complete picture of your topic, and also include keywords your target audience might use in place of the one you chose.

A good keyword research tool (like SEMrush or Moz) will typically provide you with a list of related (or semantic) keywords… but you don’t have to shell out dough to get the ball rolling.

For starters, start typing your keyword (or keyword phrase) into Google’s search bar. Google will automatically provide you with a list of ‘related queries’ based on what you are typing in. Scanning through Google’s suggestions can be a great way to find some semantic words and phrases for your post.

You can even search for your phrase (eg. ‘Used Fishing Gear’) and scroll to the bottom of the first page of results. Google will provide a list of related searches for you to consider.

Related search results
Searches related to Used Fishing Gear provided by Google

In this example you can pick out things that could be useful to include in your post, like swapping out “gear” for “equipment”. Gear and equipment, in this example, would be semantic keywords.

Using the free “Google it” method can be helpful, but does not provide all the search data (like number of searches, search intent, etc.) that a paid tool would— but it’s a good start!

Primary keyword in first 100 words

While it’s important to refrain from “stuffing” keywords, using your primary keyword(s) in the first 100 words proves to be an effective SEO strategy.

Google’s algorithm is something none of us will likely ever fully understand, but there is evidence that the copy / words towards the beginning of your post have some additional weight.

Besides making sure that your primary keyword(s) (or keyword phrase) is in the title, a good rule of thumb is to repeat it again within the first 100 words of the body copy (with the ‘<p>’ tag).

This is easy to do in a natural way, as the first 100 words is usually your introduction to the post topic, and working in the keyword or phrase can be done in a natural voice (eg. ‘I’m going to explain why I think you should buy used fishing gear online, instead of new from the store’ if your target keyphrase is ‘used fishing gear’).

To be sure and practice what I preach, you can see that this article (even though I don’t expect it to rank in search engines) uses the keyword phrase (the title of this post) in the first 100 words.

Primary keyword in first 100 words
Example of this post using the keyword phrase in the first 100 words
Primary Keywords in Title

When you’re writing a blog post, it’s important to make sure your primary keyword (or phrase) is in the title of the post.

There’s a lot that can be said about keywords, how to use them, how important they are, or why they don’t matter… But there’s no denying the fact that the title of your article is often one of the most crucial parts.

For starters, the title is going to be the first thing the viewer sees and what they base their decision on as to if they will continue to read or not. It’s important that the title has some relevancy to what the topic is. In most cases, the topic has to do with the keyword you are trying to rank the post for.

Additionally, the title of your post is generally the only H1 tag on this page— giving it the most “weight” in terms of importance.

As an example, if you’re writing a post about the benefits of buying used fishing gear online, you’d probably want to rank for “used fishing gear”, and you would want your visitors to know that this post is about “used fishing gear”. It just makes sense to work this into the title (eg. ‘Buying Used Fishing Gear Online: Is it Worth it?’)

How to set the title of your blog post

From the WordPress dashboard, hover over posts and click ‘Add New’. The next screen will be the WordPress editor, and the first field is for the title.

Adding a title to your blog post
Adding title to post

Simply type your post’s title in that field, and you’re good to go!

Keep in mind that most themes, by default, will use the title of the post as the H1 tag and display it as the largest headline on the page. WordPress will also default the URL or “slug” of the post to match this post title. Of course, you can override all these things if you wish.

Add Image Alt Tags Featured Image 1

Image alt tags (or “Alternative Text”) improve you accessibility and tell search engine spiders what your images are.

Imagine using your website with your eyes closed. Without the visuals, some key elements (like images) would get completely lost. Image alt tags provide a text description of your image for both the visually impaired and search engine spiders.

Alt tags can improve your SEO, and are considered best practice when publishing a website.

Do all of my images need alt tags?

As a simple rule of thumb, any image that you upload to your website need to have an alt tag unless it is purely for design purpose (like abstract background shapes) and serves the user no contextual value.

What should I write in my alt tags?

While having another place to add keywords to your website is always good, you need to focus on the user first. Best practice is to briefly, but accurately describe what is seen in the image. Imagine you were having to explain the image to someone on the telephone.

If, for instance, you were using this image on your website:

two pigeons walking in green grass
Image example

A good alt tag could be “two pigeons walking in green grass”. You don’t want to be too vague (using the word “pigeons” only), at the same time you don’t have to cover every detail. A simple description that clearly explains the image is perfect.

Where do I add alt tags?

WordPress gives you the ability to add alt tags by default, so there is no additional plugins or code you need to accomplish this.

If you view your media library (from your WordPress dashboard, hover over ‘Media’, then click ‘Library’) you will see a gallery of all your images. If you click on an image it will bring up the “Attachment Details” dialogue box. The image alt tag can be added on the right hand side in the field labeled “Alternative Text”.

Attachment details window

Once you type in your alt tag, it is automatically saved, and you can use the navigation arrows at the top of the window to go through all your photos.

Best practice is to add your alt tag any time you upload an image. By getting in the habbit of doing this each time, you won’t end up with a long list of images without alt tags that you have to write all at once.

Meta Descriptions Featured Image 1

Meta descriptions are short summaries of each of your webpages displayed below the link (title tag) in search results.

meta description in search results
Example of meta description in search results

Where do I set meta descriptions?

Setting your meta description is much easier with the use of an SEO plugin, which will give you the ability to set the meta description on a page by page basis.

The dialogue box for setting your meta description varies from one SEO plugin to the next, but most look similar to this:

Meta description dialogue box in SEOPress

What should I write in my meta description?

The purpose of your meta description is to give the viewer (often someone looking through the search engine results) a good understanding of the content they’ll find on your page. While your meta description doesn’t have a direct effect on your rankings, because it does affect how many people click through to your website, it has an indirect effect (better click through rate = better rankings).

You want to keep your meta description between 50-160 characters, and it should be written in a natural active voice. Since there’s no direct SEO benefit here, there’s no need to “stuff in” keywords.

Write the meta descriptions as a “marketer” making your description more compelling than others that rank for the same topic. The goal here is to be as descriptive as possible and entice people to click through to your website to learn more.

If you feel stuck, try researching what others have used in their meta description (by searching for the keywords you wish to rank for) and gather ideas.

Lastly, you’ll want each page to have its own, unique meta description. It can be tempting to “skip” this step, or copy and paste from one page to the next, but those who write unique descriptions for each page see the best results.

Write page titles 1

Your page title (also known as ‘SEO title’ or ‘title tag’) is the short title of your page that appears at the top browser window and in search results.

Page title in search engine results

Where do I set my page title?

Setting your page title is much easier with the use of an SEO plugin, which will give you the ability to set the page title on a page by page basis, or set specific rules for how your page titles can be automatically formulated (e.g. “%Page Name% | % Website Title”).

The dialogue box for setting your page title varies from one SEO plugin to the next, but most look similar to this:

Page title using SEOPress

What should I write in my page title?

Your page title serves two purposes:

  1. Tells people using a search engine what your page is about
  2. Tells search engines what your page is about

Because of this, you want to make sure that the title is optimized for both bots and humans alike.

Here are a few tips to writing effective page titles:

  • Each page should have its own unique title
  • Write for humans first, often you’ll include SEO benefits naturally.
  • If there are keywords you’re trying to rank for, try putting those at the beginning of the title.
  • Give a clear and accurate representation of the contents of that page (no trickery!).
  • Try to stay under 60 characters in length (most SEO plugins will test this as you type)

Don’t be surprised if Google doesn’t always use the title tag you set in search results. While setting your title tag does give Google a suggested title, they will sometimes alter it to better match the users search query or what they’ve determined is most accurate for the page (at their discretion).

Well written, accurate, SEO-rich titles will help you rank higher in search results and give your website a better click-thru rate.